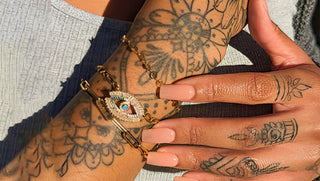
Bracelets are more than just ornaments; they are expressions of style, sentiment, and individuality. The essence of a bracelet lies not just in its design but also in its security, ensuring it remains snugly wrapped around your wrist. For anyone who's ventured into the world of jewelry, especially DIY enthusiasts, knowing how to tie a bracelet knot is a fundamental skill. This guide simplifies the process, ensuring that whether it's a handmade piece or a treasured birthstone diamond tennis bracelet, it stays put.
Understanding the Basics
Before diving into the actual knot-tying process, it's essential to understand a few basics. The type of thread or string you use, its thickness, and the weight of the bracelet can all impact the kind of knot you should opt for. For heavier bracelets, a more secure, tighter knot is advisable, while for lighter pieces, a simple knot might suffice.
The Traditional Overhand Knot
One of the simplest and most common bracelet knots, the overhand knot is ideal for beginners and works well for most bracelet types:
- Hold the Ends: Grasp both ends of the bracelet thread or string, ensuring they are aligned.
- Create a Loop: Form a loop by crossing the right end over the left.
- Tuck and Pull: Now, tuck the right end underneath the left, pulling it through the loop. Pull both ends simultaneously to tighten.
The Sliding Knot
If you're looking to create adjustable bracelets, the sliding knot is your best bet. It allows the wearer to adjust the bracelet's size as per their preference:
- Overlap Ends: Place one end of the bracelet string over the other, ensuring a considerable overlap.
- Form Loops: Using the overlapping end, form two loops around the other string, moving towards the bracelet's main body.
- Tighten: Push the end through the loops and pull it tight. Repeat the process for the other side to create a symmetrical sliding mechanism.
Securing Specialty Bracelets
For those prized jewelry pieces like the birthstone diamond tennis bracelet, a more secure fastening technique is recommended. While many of these come with clasps or other fastening mechanisms, if you're looking to add a personal touch or secure a broken clasp temporarily:
- Loop Technique: This involves looping the bracelet end through the clasp ring, then tying a simple overhand knot. The knot should be tight enough to prevent it from sliding out but loose enough to be untied when needed.
- Double Knot: To add an extra layer of security, especially for heavier bracelets, consider tying a double knot. After the first overhand knot, simply repeat the process before pulling tight.
Aftercare and Maintenance
Once you've mastered the art of tying a bracelet knot, it's essential to maintain the integrity of the knot and the bracelet:
- Regular Checks: Every once in a while, check the knot for any signs of loosening. If you spot any, simply re-tie.
- Storage: When not wearing the bracelet, store it flat to prevent any strain on the knot.
- Know When to Untie: If you've used a temporary knot for specialty bracelets, remember to untie it and opt for a more permanent fastening solution soon.
Knot Just a Skill, but an Art
Knowing how to tie a bracelet knot is not just about keeping your bracelet secure; it's about preserving memories, sentiments, and values embedded in that piece of jewelry. As you tie and re-tie, you're not just securing a piece of ornament; you're embracing a world of tradition, craft, and personal expression. So, the next time you wear that special bracelet, remember the art and skill that goes into every knot, making each piece a little more special.

